Come check out the latest on ...By Nicole over at kidsbynicole.com.
XO!
7.09.2013
5.10.2013
FREE App Friday!
If you have any little ones around (kids, students, grandbabies...) you MUST check this out! I just downloaded ALL of them because... well, they're FREE!
Check them out at Smart Apps for Kids
What's your favorite app for kids?
XO!
Check them out at Smart Apps for Kids
What's your favorite app for kids?
XO!
5.09.2013
4 Teacher Appreciation Gift Ideas
1260. That is the number of hours your child's teacher spends with your little one in a school year. Each of these hours is filled with patience, knowledge and love. Even if your kid is driving them up a wall, a good teacher still loves and cares for the kiddo as if he/she is her own. Let one of the most important people in your child's life this year know how much you appreciate everything they do to make your little one successful.
Teacher appreciation gifts can fit ANY budget. One of the best gifts a teacher can get is a heartfelt note from the parents of one of their kiddos.
Here's what we did for Chloe's teachers this year.
On Monday, Chloe took a bouquet of flowers for her teachers to enjoy throughout the week.
Thank you card from the junk drawer: FREE
.JPG) *Tip for Fresh Flowers: For fresher flowers longer, fill the vase 1/2 with water. Add 1 capful of Hydrogen Peroxide to kill any bacteria in the water. Add 1 teaspoon of sugar to "feed" the flower.
*Tip for Fresh Flowers: For fresher flowers longer, fill the vase 1/2 with water. Add 1 capful of Hydrogen Peroxide to kill any bacteria in the water. Add 1 teaspoon of sugar to "feed" the flower.
On Tuesday, we set a goodie bag for each teacher.
A large container of Hand Sanitizer: $1.00
Fingernail polish removed: $1.00
Fun summer color of finger nail polish: $1.00
Cute nail file: $.50
Traced and cut out preschooler hand with "You deserve a hand for all you do!": FREE

.JPG)

Teacher appreciation gifts can fit ANY budget. One of the best gifts a teacher can get is a heartfelt note from the parents of one of their kiddos.
Here's what we did for Chloe's teachers this year.
On Monday, Chloe took a bouquet of flowers for her teachers to enjoy throughout the week.
Hy-Vee bouquet of Lillies: $4.99
Vase from the collection under the sink: FREEThank you card from the junk drawer: FREE
.JPG)
On Tuesday, we set a goodie bag for each teacher.
A large container of Hand Sanitizer: $1.00
Fingernail polish removed: $1.00
Fun summer color of finger nail polish: $1.00
Cute nail file: $.50
Traced and cut out preschooler hand with "You deserve a hand for all you do!": FREE

On Thursday, some chocolate bars and mixed candy for a sweet treat for each teacher.
A glass candle holder: $1.00
Mixed candy: $2.00
.JPG)
On Friday, an Easy Mug Cake mix to enjoy for each teacher.
A tupperwear container with a tight lid: $.50
1 box of Angel Food cake mix: $1.50
1 box of Chocolate cake mix: $1.00
A note with instructions: FREE
*Add 3 tablespoons of cake mix and 2 tablespoons of water to a microwave safe mug/bowl for 1 minute. Top with icing, powered sugar or whipped cream.

*To make this totally adorable bow: How About Orange
Total spent for a week of spoiling: $9.75 per teacher. A measly price to pay for the gratitude we feel toward both of her preschool teachers.
How do you show your little one's teachers how much they mean to your family?
XO!
5.08.2013
Making the Switch to Wordpress
XO!
5.01.2013
Zipzicles - The Smartest Things Since Sliced Bread!
Have you been over to Tutus and Tea Parties website lately? She has an awesome giveaway for the smartest invention since sliced bread!
Zipzicles are these super cool (haha, it's a pun) zip top bags that you can use to make your own popcicles, or whatever you want!
For only $2.99, you can buy a package of 12, which is a good deal for providing your little ones (or yourself) a healthier alternative to store bought popcicles without the mess of melting or sticks!
Pop over and enter!
XO!
For only $2.99, you can buy a package of 12, which is a good deal for providing your little ones (or yourself) a healthier alternative to store bought popcicles without the mess of melting or sticks!
Pop over and enter!
XO!
Cleaning Vomit out of Carpet
I hate that I have this experience to share, but I suppose its a celebration that it took us over 4 years to have it.
Cleaning Vomit out of Carpet
*spoon
*paper towels
*baking soda or corn starch
*stain remover of your choice (here's mine)
*vacuum
Scrap as much of the vomit up using the spoon as you can.
Blot the remaining spot with paper towels to absorb as much liquid as you can.
Sprinkle baking soda or corn starch onto spot and let it sit for 15-20 minutes.
Vacuum
Use stain remover for any remaining color.
Sorry you need this and I hope someone gets better soon!
XO!
| This is how I felt at 3:00 this morning... but more disheveled. |
*spoon
*paper towels
*baking soda or corn starch
*stain remover of your choice (here's mine)
*vacuum
Scrap as much of the vomit up using the spoon as you can.
Blot the remaining spot with paper towels to absorb as much liquid as you can.
Sprinkle baking soda or corn starch onto spot and let it sit for 15-20 minutes.
Vacuum
Use stain remover for any remaining color.
Sorry you need this and I hope someone gets better soon!
XO!
4.30.2013
A Meltdown over Poop
This is only ONE of the many differences between our 2 kids, but its a difference I'm struggling with a lot. Aria has had a rough go with her tummy since 2 weeks old. First was a battle with colic (here was the beginning) and now is a battle of constipation.
Aria has been breastfed until a week ago, when we began introducing formula 1 bottle at a time. Her first formula bottle was 1 week ago and she spent the next day "spitting up" (I called it throwing up because it was everything she'd eaten... the nurse didn't agree since there wasn't any "wrenching"). My initial thinking was... omg, what did I do to our poor baby girl?! But I followed the nurse's urge to continue formula and allow her little body time to adjust. The next day, I noticed that she was only "spitting up" when she was straining to poop. (Pooping has never been her strong suit, usually going days -a week, a couple times- between bowel movements and often times harder stools.)
After talking to the doctor and nurse on the phone a few times, we have tried: eating prunes, drinking prune juice, tummy massage, water, and bicycle legs. The catch-22 of the situation is that she doesn't poop every day, which means she doesn't have to feel miserable while pushing every day - but also I'm sure it makes it worse when she does since it's not a daily occurrence.
This morning, on the way to preschool, she began straining to poop and "spit up" clear liquid, enough to soak her shirt. I hurried home to get her cleaned up and hopefully find a dirty diaper. No luck. All that pain for nothing... just a wet diaper. For the next hour, she went about her day eating and playing without any trouble. Until she tried going again... up came most of her food, again (but this time it came out of her mouth and nose and was very thick). She did successfully get a small nugget out, but man... this is not OK.
.JPG) A serious conversation with her doctor (and the med student that always happens to be there for appointments when I don't want him to be) about her tummy troubles, and our major concern for her not growing more quickly, I left with our 12 lb 2 oz, 8 month old and headed to Walgreens to pick up Miralax and some high calorie baby food.
A serious conversation with her doctor (and the med student that always happens to be there for appointments when I don't want him to be) about her tummy troubles, and our major concern for her not growing more quickly, I left with our 12 lb 2 oz, 8 month old and headed to Walgreens to pick up Miralax and some high calorie baby food.
1 teaspoon of Mirlax into a bottle after dinner last night, a good night's sleep and a painfree poop later... she can suddenly crawl! Imagine my surprise when I set her down on the floor this morning. Poor girl must have been miserable!
Is she the only one with these tummy troubles?
XO!
Aria has been breastfed until a week ago, when we began introducing formula 1 bottle at a time. Her first formula bottle was 1 week ago and she spent the next day "spitting up" (I called it throwing up because it was everything she'd eaten... the nurse didn't agree since there wasn't any "wrenching"). My initial thinking was... omg, what did I do to our poor baby girl?! But I followed the nurse's urge to continue formula and allow her little body time to adjust. The next day, I noticed that she was only "spitting up" when she was straining to poop. (Pooping has never been her strong suit, usually going days -a week, a couple times- between bowel movements and often times harder stools.)
After talking to the doctor and nurse on the phone a few times, we have tried: eating prunes, drinking prune juice, tummy massage, water, and bicycle legs. The catch-22 of the situation is that she doesn't poop every day, which means she doesn't have to feel miserable while pushing every day - but also I'm sure it makes it worse when she does since it's not a daily occurrence.
This morning, on the way to preschool, she began straining to poop and "spit up" clear liquid, enough to soak her shirt. I hurried home to get her cleaned up and hopefully find a dirty diaper. No luck. All that pain for nothing... just a wet diaper. For the next hour, she went about her day eating and playing without any trouble. Until she tried going again... up came most of her food, again (but this time it came out of her mouth and nose and was very thick). She did successfully get a small nugget out, but man... this is not OK.
.JPG)
1 teaspoon of Mirlax into a bottle after dinner last night, a good night's sleep and a painfree poop later... she can suddenly crawl! Imagine my surprise when I set her down on the floor this morning. Poor girl must have been miserable!
Is she the only one with these tummy troubles?
XO!
4.27.2013
Overwhelmed... or maybe underwhelmed?
The last couple of weeks I've been down. I want to blame it on the rainy, cold weather, but I don't even think that's it.
I feel like one of those balloons that is only doing enough to just skim the carpet, but doesn't have the air to float. Its even worse that I know I'm being like this.
I keep going through all of the excuses in my head, and reassuring myself that once this is over or once that happens, I'll go back to feeling normal... I know it's in my head... I know it won't go back until I make it happen.
Here's to pushing through
XO!
4.18.2013
I Feel Like I Just Wrote This Post
It wasn't more than 4 weeks ago that I was writing about how fast things can change. 3 1/2 weeks ago it was my mom who was in bad shape. The last 2 days, my dad has been in the hospital going through a battery of tests.
This isn't the first health scare my dad has been through, and each one gets increasingly scary. Not just for him... for my mom... for me... and now for Chloe. She has had anxiety since yesterday morning when we stopped by to see him at the hospital. I feel like the worst mom putting her through it and it was absolutely not my intention, of course.
She began by complaining that her head hurt and that it felt like that was an ice cube inside her brain. I chalked it up to having an "ice cream headache" because she was drinking ice water, and it was pretty short lived. Later last night, she mentioned 3-4 times that she felt as if she were floating up toward the ceiling. I immediately started questioning her about how everything else was feeling. Once I realized what was happening with her, we sat down to have a reassuring talk.
*Papa is in the hospital to get help from the doctors.
*The hospital is the best place to be for someone who's very sick.
*He WILL be okay.
*(and I may have ---lied--- and said that he would be heading home the next day)
Truth is, I don't know when he's coming home. I don't know if he'll be okay. And if he's not, I don't know that I will be okay.
4.15.2013
Breastfeeding is Hard, Part 3
This post is an honest account of a new mom and breastfeeding.
If you missed Part 1 and Part 2, catch up here and here.
It's been over a month since I posted Part 1 and Part 2 about breastfeeding. I didn't intend to post a Part 3, but the last couple of weeks have been very hard and I realized, I am probably not the only one. So let's support each other.
As I mentioned in Part 2, Aria is gaining weight (or I should say not gaining weight), at an incredibly slow rate. At her 6 month check-up, she weighed 11 lbs, 10 oz. (I was informed that if there was something smaller than 1 percentile, we'd be in that category.) At a doctor appointment 2 weeks ago to check for ear infection because of a lot of extra crying and fussiness, she weighed 11 lbs, 10 oz. Exactly 1 month later, she had not gained a single ounce.
Aria nurses 5 times a day (every 3 hours, and I usually have to make her eat because she's not ready yet), and eats fruits/veggies/cereal 2 times a day. She chows down on the solid food, eating more than a serving at each meal.
When she nurses, it has been very frustrating. My letdown seems to be taking longer than in the previous months, and she is not patient when there is other things she would rather be doing. She eats for 3-4 minutes, pulls away and cries. I switch sides and the whole process repeats. I don't know if my milk supply is not enough for her, I don't know if she's full and telling me no more, I don't know if something else is bothering her... ugh.
I've tried all sorts of things to help the situation. I've spent several days pumping right after she finished eating to help boost supply (I usually got 5-10 DROPS of milk...). We've experimented with positions. We've experimented with quiet locations. I've tried, unsuccessfully, to get ahold of our lactation consultant for the last week. It all sucks...
I'm ready to throw in the towel. No more stressing out about feeding her while I'm not with her (getting a bottle takes 3-5 pumpings). No more worrying about feeding her out and about. No more wondering if she's getting enough.
And I feel guilty about quitting... I don't know what to do.
What did you do?
XO!
4.10.2013
I Pinned This - Honey and Cinnamon Cleanse
I don't know about you, but this pin has been blowing up my Pinterest feed for the last several days. (I'm pretty sure there is another pin with a different picture and the same information floating around, too.)

Here's what Pinterest promises:
Honey and cinnamon cleanse every morning, on an empty stomach, half an hour before breakfast, and again at night before sleeping. Drink honey and cinnamon powder boiled in one cup water. If taken regularly it reduces the weight of even the most obese person. Also drinking of this mixture regularly does not allow the fat to accumulate in the body, even though the person may eat a high calorie diet. 2 teaspoons of ground cinnamon and 2 teaspoons of honey in a cup of boiled water.
Here's what I did:
To start, I didn't even intend on this pin making it to my blog because I figured the results would be inconclusive at best. But it's on here for a whole different reason.
I started the kettle on the stove with some water, dumped 2 teaspoons of ground cinnamon and 2 teaspoons of honey into a mug. When the kettle began to whistle, I poured in the water and stirred and stirred and stirred. (In my head, I always think of a teaspoon as a VERY small amount, but the amount of ground cinnamon that it ended up being was A LOT)
.JPG)
I let it sit for a couple of minutes to cool down before tasting it, and I wish I had forgotten all about it.
The taste... OMG... I took a teeny tiny sip (as to not scald my tongue and palette) and I chocked on the dryness of the cinnamon. I did not taste any honey, I did not taste any water, I COULD NOT get the taste out of my mouth. The 1 sip lasted about 3 hours, 28 oz of ice cold water, and a cup of milk.

I should have known it was too good to be true.
XO!
4.06.2013
She Believed She Could, So She Did Art DIY

I saw this quote on Pinterest and found in love. Can you think of any stronger message to send to your daughters?
I immediately went to work creating something with this saying on it for Chloe's room.
Pick out a font that you think fits the message best and print it out on regular typing paper.
.JPG) |
| I don't know why it's sideways but you get the point. |
Using puffy paint in the color of your choice, trace carefully over the words. (If you mess up, move the wax paper and try again - FOOL PROOF!)


Continue until all of the words are covered. Let dry.
Once all of the letters are dry, line them up onto your canvas however you would like them to be arranged. Play around with it until your happy!
Use Mod Podge and carefully glue each letter into place. I picked up 1 letter at a time, and replaced it before picking up the next letter. This helps to keep the words aligned. (You could also use a ruler as a straight edge if needed).

I choose white puffy paint on white canvas intentionally. My original idea was to spray paint the whole canvas the same color pink that I used on Chloe's bookcase, but I ended up really liking it white and haven't pulled the trigger on painting just yet. (My white puffy paint is iridescent, which helps it to "pop" off the canvas.
Ta Da! The possibilities are endless with this project! Different colors, different sayings, adding a design... make it your own!
XO!
4.05.2013
I Pinned This - Shape-able Ice Pack
Summer is just around the corner, which means shorts and scraps. Getting bruises and scraps is part of being a kid and no matter how hard you try, inevitable. We have ice packs in our freezer for lunch boxes or bottle carriers, but they are the super hard, not very comfortable, kind of ice pack that does not work well for the body. I saw this on Pinterest awhile back, but finally decided to give it a go.


 When I checked on it the first time, it was perfect. Shape-able, soft, COLD.
When I checked on it the next morning... it was rock hard, burn your skin cold, and leaking something strange.
Maybe I just overfilled the bag... but for now...

Here's what Pinterest promises:
To make your own shapeable ice pack for booboos and sprains: Mix 1 part rubbing alcohol with 3 parts water in a ziploc bag. Double bag it with another ziplock bag, and put in the freezer. Pull out and put inside a tea towel or fabric bag, use on sprains, strains and other booboos. (disdressed.blogspot.com)
Here's what I did:
I gathered the materials (which is luckily something that is always in the bathroom cabinet).
I took a picture of a bottle of rubbing alcohol, an empty
ziploc baggie, and a glass of water ... but then deleted it on accident
I mixed 1/4 cup of rubbing alcohol and 3/4 cups of water in a snack size baggie. Stuck it in the freezer and forgot about it waited.


When I checked on it the next morning... it was rock hard, burn your skin cold, and leaking something strange.
Maybe I just overfilled the bag... but for now...

Bummer. Did you have better luck?
XO!
4.01.2013
Monday's Favorites


Bright Starts Vibrating Teether - Berry was something that was in Aria's Easter basket and she loves it! When chewed on, it slightly vibrates, soothing any sore gums that come from teething. I picked mine up at Target, but Toys R Us has them too for $6.99.
.JPG)


Another Easter gift was these Magic Beans. These fun little beans grew into lollipops/suckers while we were gone for Easter dinner. Chloe loved everything about planting them and picking them!


The hubby has been suffering from a migraine since early Sunday, so both girlies sleeping during nap time was a MUCH needed break!
What's your favorite thing this week?
XO!
3.27.2013
I Pinned This - Easter Eggs
Easter is just around the corner and we had yet to decorate eggs. Today was the day and instead of using the typical Easter egg dye, I wanted to give this Pinterest find a try

.JPG)
.JPG)


Here's what Pinterest promises:
Coloring Eggs - Use Shaving Cream and food coloring (dark colors) - roll in shaving cream let sit, wipe off. Very Cool for Easter!
Here's what I did:
I gathered up all of the materials needed.
.JPG)
Chloe swirled the food coloring around in the shaving cream.
.JPG)
We rolled the egg around.

Let it sit, then wiped it off.


Eh.
We like bright colored eggs so for us...

Worst part... my hands will probably look like this until tomorrow night. Sucky.

We resorted to normal Easter egg dye after 3 attempts.
XO!
3.25.2013
A Personal Anxiety Attack
Life is normally predictable. You know what tomorrow will bring by looking at your schedule. Plans are made for your day and are expected to be met to some degree.
Then there are the days where something happens and everything is thrown into the air, leaving you to wonder when things will feel back in place. Leaving you standing there, awe-stricken at how many things we take for granted. Sometimes these days are rocked by a unexpected death, an accident, or a broken heart.
I'm close to my parents. Physically (about 7 miles between our houses) and emotionally (we talk daily). A year ago, my dad went through a threatening case of diverticulitis (a hole in the colon). It was a couple weeks in the hospital, intense treatments of antibiotics, and a lot of worry. When he was first diagnosed, it was extreme enough to push your mind to the dark side of losing a loved one, and it rocked my world for quite a while.
Thursday night, my healthy mom tripped on a kitchen rug and fell. Big deal, right? We all trip and fall. There was no one home to see what happened, but the end result of her falling is a crushed eye socket, broken left side of her nose, and a pinched muscle that affects her ability to blink and see. She hit the sharp corner of the island with her chest leaving a small puncture wound. She's sore from landing, from the swelling, from her glasses smashing into her face.
As we learn the extent of the damage, and the amount of surgery she will need to correct the breaks, it makes me sick. Sick with worry, sick with anxiety attacks, sick with "What if"s.
Life is precious. Life is short. A simple trip can send things falling into chaos.
Hug your loved one a little tighter next time and remember to enjoy the little things. I will every time I see my mom, knowing although this sucks, she will be OK.
XO!
3.21.2013
Alphabet Easter Activity for Little Ones
This is a super fun way to practice letters with your toddler or preschooler! There are so many variations that can be done to satisfy your little one's development and what kiddo doesn't love Easter eggs?!
Start with a bag of plastic eggs. I got this bag from Walmart, about $1.99. 48 eggs total. We only need 26.
.JPG) Based on your little one's letter recognition, you can do this a couple of ways.
Based on your little one's letter recognition, you can do this a couple of ways.


.JPG)
Start with a bag of plastic eggs. I got this bag from Walmart, about $1.99. 48 eggs total. We only need 26.
.JPG)
- The first way is to write the uppercase letter and lowercase letter on the same colored egg. This will help narrow the choices down for your kiddo, making them feel more successful (which is what this is ALL about).
- The second way is to mix all of the egg pieces up and write the uppercase and lowercase letters on different colored pieces. They will have to rely on the letter, rather than the color. (You will have to cut the pieces apart if you choose this method.)


Using a sharpie, and your best writing, write an uppercase and lowercase for each letter. Make sure to get the uppercase on the TOP egg and the lowercase on the BOTTOM egg.
.JPG)
My daughter knows all of her letters so I opted for the mixed colored eggs. This is will help her become more fluent with recognizing both uppercase and lowercase letters.
Activities with your eggs: (remember, your goal is to help your child feel successful so start small)
- Start with a few eggs (the letters in their name is a great start). As your little one gets better, add a couple of eggs.
- Hide the eggs and line them in ABC order as you find them.
- Put small objects that begin with that letter and guess what may be in it.
- Have your little one sort objects by beginning sound and put in correct egg.
Can you add any fun activities to the list?
XO!
3.20.2013
I Pinned This - Mess Free Painting
Sometimes messy things don't bother me. Sometimes I would rather stab myself in the hand than deal with the mess. Today is one of the stabbing kind of days.

Here's what I did:
I got a Zip-loc bag, the only paint we had laying around, and some clear packing tape.
I squeezed in some paint. Not too much because I know my kid and the likelihood of the painting squirting out from too much pressure was high.
 I taped it up to the sliding glass door instead of the table. Partly because of what I said about paint squirting out (and the hope that it would be harder to pop the paint up) and letting the light shine through the bag to see whatever she was "painting".
Play and enjoy!

.JPG)

Here's what Pinterest promises:
I got out a plastic freezer Zip-loc bag and cut a piece of card stock to fit inside the bag. I squeezed some big drops of different coloured tempera paint onto the paper and very carefully slid the paper into the bag. I then closed the bag and using duct tape, taped it to one of our craft trays. (Rainy Day Mum)Here's what I did:
I got a Zip-loc bag, the only paint we had laying around, and some clear packing tape.
.JPG) |
| I keep my paint in a bottom drawer of my craft dresser, thus the dot of paint on the top of the lid. It helps know what color the bottle is without pulling every container out! |

 |
| Make sure to squeeze all the air out of the bag before sealing and taping it! |

.JPG)
And even with my high-energy little one, this was fun and held her attention for enough time to make lunch at least!

XO!
3.18.2013
Monday Favorites

This is quite pathetic, but sometimes my blonde really comes through. I just discovered that ear buds have a correct ear to go in (The little R and L). They fit SO much better!
.JPG)
What's your favorite thing this week?
XO!
3.14.2013
Upcycling a Baby Doll Bed Tutorial
Isn't it funny how innate it is for little girls to play mommy? I love watching Chloe be sweet and loving to her babies (all 8324 of them). While helping her go through her toys the other day for our monthly "Let's get rid of anything you don't play with!", I noticed her baby pack-n-play was ripping at the bottom. It wasn't too surprising, considering the material used to make it, is the same thin material most princess costumes are made of. (and we all know how easily those rip or fray or snag!)
My first thought was to sew up the hole real quick and move on. But the more I sewed, the more it ripped. 2 hours later, someone had a completely "new" baby bed. (It's most definitely not perfect, and when I was taking the frame apart and putting it back together, I tweaked the levelness of it somehow... but it holds babies, the fabric is cute, and Chloe loves it)

sewing machine (hand sewing would take forever, but you could)
scissors
fabric for the sides ( 11" x 36" )
fabric for the bottom ( 12" x 21")
thread to match
coordinating ribbon

- Begin by cutting your pieces. I struggled with the decision to cut panels, or use one long piece of fabric. I decided it would be easier to manage with panels. (each measurement allows for a 1/4" seam)
- 2 side panels measuring 11x14"
- 2 side panels measuring 11x22"
- 1 bottom panel measuring 11x21"
- Sew these all together with a 1/4" seam. (I hate 1/4" seam, but it allows for the least amount of fabric waste.
- *Don't forget* Iron your seams for a sharp edge.

- Now that you have one long piece of fabric, measure the allowance for your bed leg. Mine was 1 1/2". (put your pins in to hold it, then check with the leg before sewing)
- *Tip* Use a rubberband to mark your seam allowance to keep your sewing straight!


- Attaching the bottom seemed intimating at first, but just take it one side at a time. I started with a longer side to get it out of the way.
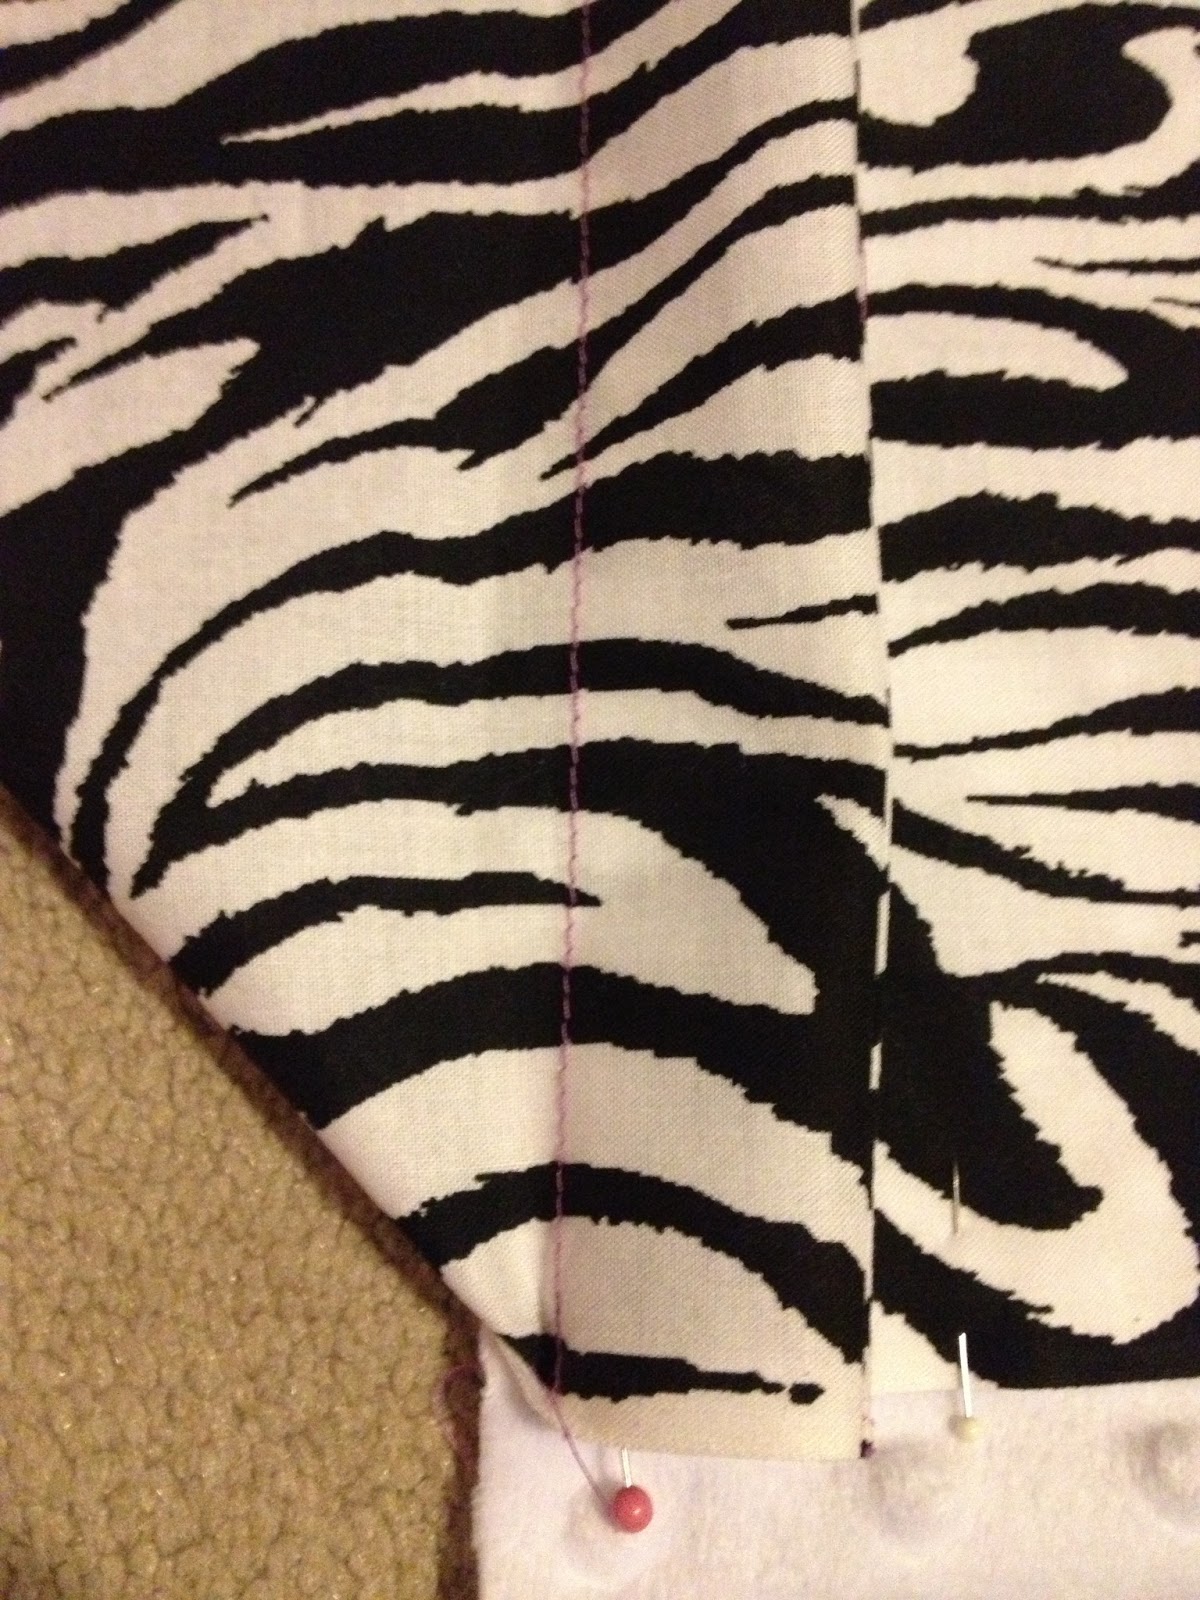
- *Tip* When sewing with Minky fabric, pin every inch. The fabric stretches as it runs through your machine and will bunch up if you are stingy with your pins.

- As you begin to sew around the bottom, think of the extra material as wrapping paper. Fold it as you would if it were a present to keep it out of the way.
- Attach your bottom to the "wrong" side of the fabric so when you look into the bed, you see the "right" side of the fabric at the bottom.
- DO NOT sew the "pocket" for your bed leg. I used a larger pin to remind myself when to STOP before closing the "pocket".

- After attaching the bottom, fit your creation (what would you call this thing?) onto your baby bed to make sure all is well.

- Cut 10 pieces of ribbon and sear the edges with a lighter to keep them from fraying. Line them up evenly along the top (over the rail) and attach with pins. Hand sew or machine sew on.

- Ta Da! High five to you and be happy with the cute (more kid resistant) baby bed!

Bloopers - Almost every time I do a sewing project, I have at least 1 oops of sewing the fabric together wrong. I had 3 this time. Lesson learned, don't do this with "helpers" or past my bedtime.


XO!
Subscribe to:
Posts (Atom)